When I put my mind to getting a task done, I become completely (and almost annoyingly) determined to get it done and nothing else in the world matters until I do so. Since we moved into our new place, I’ve barely done any projects around the house (courtesy of being pregnant and exhausted 24/7) so I’ve been trying to turn that around.
As I’ve mentioned before, the third bedroom of our house is located right next to the front entrance. I mean, you walk in the door and it’s literally five feet in front of you. Because of this, I’m not comfortable with it being either of the girls’ rooms. And since it’s also just too small to be our bedroom, I decided to make it into a playroom.
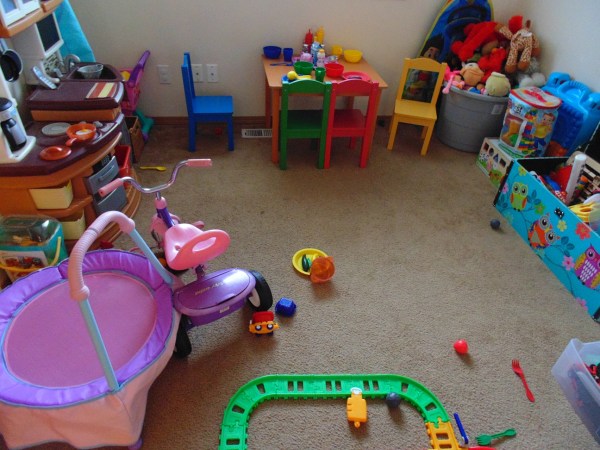
Up until about a month ago, I hadn’t really touched this room. We basically just threw all of Hadley’s toys in there when we moved in and called it good.
Not much organization, right? And not much room for playing, either! One of the easiest changes was just moving some of the larger toys, like the trampoline and the tricycle, to the garage or backyard. (Some people have been inquiring about this online, so there’s your answer, folks! 😉 )
This freed up quite a bit of space, which made things a lot easier. I had bought Hadley the table and chairs set![]() for her 2nd birthday. Isn’t it just the cutest?
for her 2nd birthday. Isn’t it just the cutest?
After that, I had Michael remove the closet doors as well as the main door, which made it seem larger and more open.
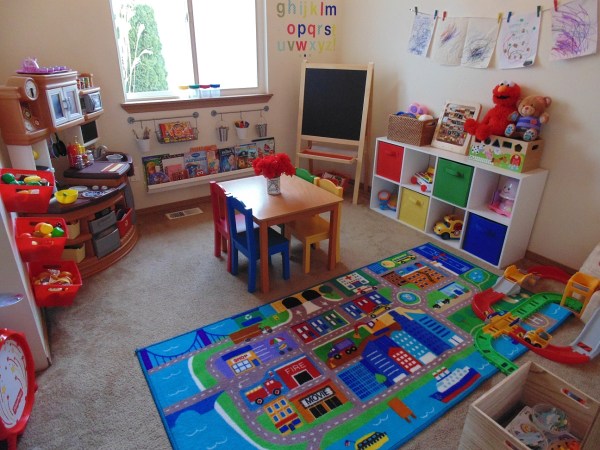
As soon as all the heavy lifting was done, I was ready to get to work! It took me about a month, doing little things here and there, but in the end everything came together perfectly and I’m very pleased with the results!
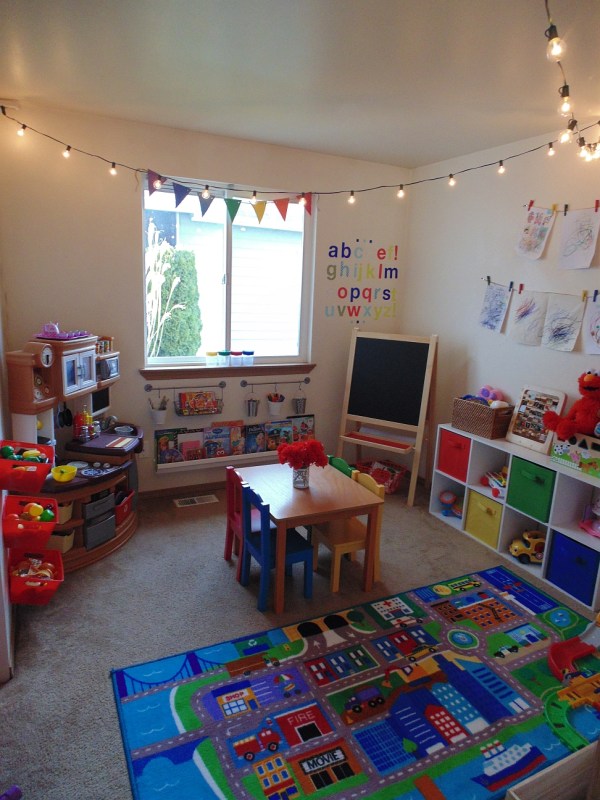
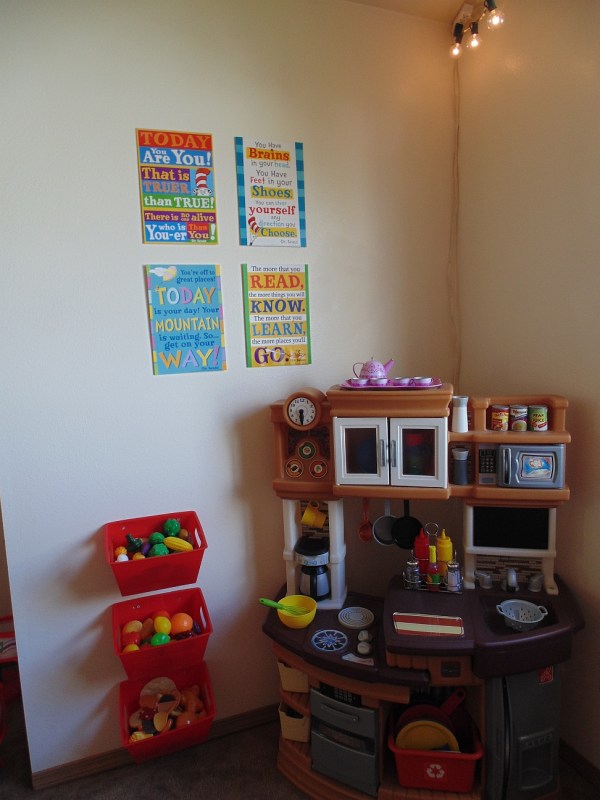
Ta-da! It’s truly amazing what organizing adding a bit of color can do for a room. I had gotten the lights on super clearance at Target last September for only $7.49 per pack. I’d been unsure of where to put them up until now, and they look so cute hung up in here.
The garland along the window is handmade using some hemp cord and construction paper- both of which I had lying around. Oh, and the cute little flowers and vase on the table? Dollar Tree!
Adding a little bit of decor to the walls really brightened everything up!
Update 05/20/2017: Unfortunately the rug pictured above doesn’t seem to be available on Amazon anymore 🙁 I linked a few alternative ones below, similar in both style and price!
This rug. is just too. dang. cute! Since Hadley loves playing with cars, I knew I just had to get her one of these. I remember having one when I was younger and my brother and I would just play for hours and hours with his Hot Wheels.
I found it on Amazon for right around $40 and I really think it ties the room together!
- Wall posters- Target dollar section
- Bins
The Dr. Seuss posters were only a dollar each at Target! Since I wanted a ton of color (and since I pretty much grew up on Dr. Seuss), I knew they’d be perfect for the playroom.
The bins I found at Dollar Tree, and work perfectly for storing all the play food in.
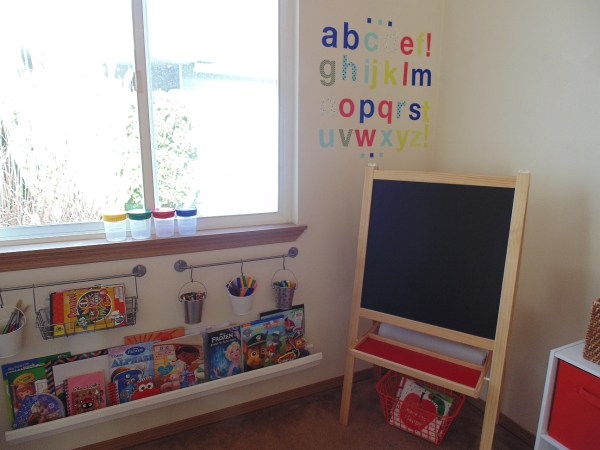
- Easel
- Wall decals- Target dollar section
- Wall rails

- Wire basket

- Hanging buckets- Target dollar section
After shopping around for easels, I was shocked to find that this one was only $15 at Ikea. (Update 05/20/17: Since this post was published, the easel has increased in price from $14.99 to $19.99.) It’s just the right size for Hadley, and even allows for a little bit of growing room!
The little buckets were in the dollar section at Target as well, and are just the right size to store all of her markers and crayons.
- Cube organizer
- Colored bins

This cube organizer is the ultimate space (and life) saver! It sells for about $45 at Target, but I was able to get it for $30 with a sale and coupon. The bins are available in a ton of colors on Amazon, and I was able to get all of mine for around $8-12 each.
What I love about this piece is that it provides adequate toy storage while hiding unnecessary clutter.
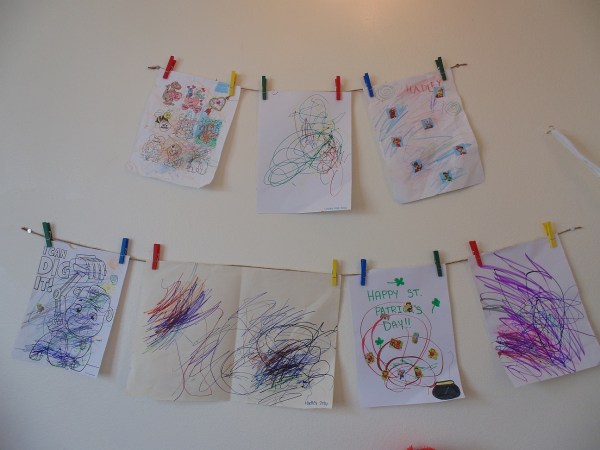
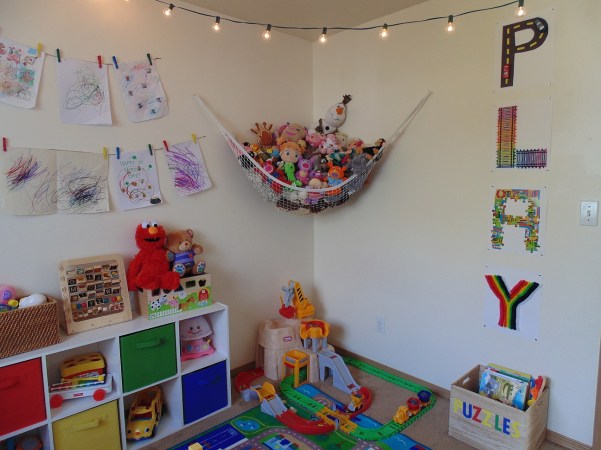
This neat little gallery wall is one of my favorite parts of the room. It’s cheap, easy to make, and provides a super cute way for Hadley to display all of her marvelous artwork! All I did was tack up a couple strands of hemp cord and used colorful clothespins to hang a bunch of her pictures.
One thing I really tried to do with this room is utilize as much of the walls as I could to save as much floor space as possible. Storing all of Hadley’s stuffed animals in a hammock instead of a big plastic storage bin freed up an entire corner!
I recently invested in a bunch of wooden peg puzzles for Hadley, so it seemed only fitting to store them in a snazzy wooden crate. All I did was throw some colorful stickers on it and I had a super cute puzzle storage bin!
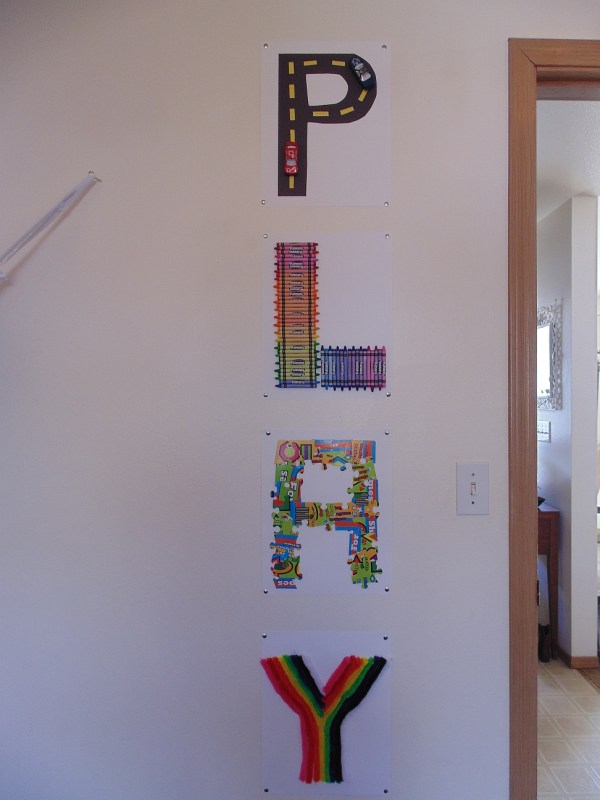
This wall decor was one of the last finishing touches I put into the room. I got the idea here from Average But Inspired.
My version, though, consists almost entirely of dollar store materials and only cost me $10 to make! The only exception were the super fuzzy pipe cleaners, which I found in the art section at Target.
The total cost of everything came to just under $200, which I think is pretty good considering all of the things I was able to accomplish. My advice to anyone out there attempting to redo a playroom (or any room for that matter): Think Dollar Tree! You’d be surprised at some of the items you can find there!
The only thing left to do now is…
…figure out how to organize this closet better! It’s a good storage solution for all of Hadley’s big bulky toys that take up a lot of space, but there’s gotta be a better way to arrange all of them. But I guess we’ll save that for another day. 😉
Until the next project!


I love the way you did this whole set up. I want to learn how to do the same thing do you have any ideas because I want to open a family home daycare
Thank you! Well my main tips would be to hit the dollar stores and use vertical storage to save floor space- you can see this idea in the red bins on the wall and the hanging buckets with art supplies in them 🙂 My best advice is to just utilize as much space as possible without overcrowding the space. There are also a ton of great ideas on Pinterest! 🙂
How did you affix the bins for play food to the wall? Thank you for sharing your playroom makeover!
Hi Carrie, my husband just drilled a couple holes onto the inside of each bin. They’ve held up very well, except for the one closest to the floor which got stepped on I believe!
I’m sure you probably figured something out for the closet, but if you haven’t, I think you could make it into a pretty sweet ball pit!! I saw one diy pit that was padded on the wall side with those foam alphabet puzzle mats. Then, they made a pvc barrier with puzzle mats and pool noodles.
Hi Angela- great idea!! Since I made this post, we actually added our own ball pit to the playroom! You can check it out here: http://thenorthwestmomma.com/diy-pvc-pipe-ball-pit/ 😀
It looks really nice. You have lots of toys and fixed it up really cute. Good job!!
Thank you 🙂 Love you guys!